We’ve already talked about all kinds of kitchen tools, but there are a few that don’t really fit any of our other categories. You can pick and choose what you think you need depending on the things you think you’ll want to make. There are only three I consider necessary for everyone.
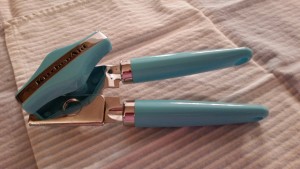
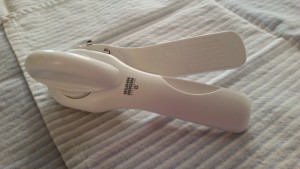
A manual can opener
Let’s start by saying there’s absolutely nothing wrong with an electric can opener. Like most of you, I grew up using one. I continued to use one until it quit working about 10 years ago. Then I started using the emergency backup manual can opener I found in the back of my kitchen gadget drawer…and I never looked back. They’ve come a long way from the one Great Aunt Tilly used back in the day. There are a couple of styles to choose from.
There are traditional ones that cut into the can lid above the seam (leaving a sharp edge on the lid) and safety models that separate the seam between the lid and the can (leaving safer dull edges). I use a traditional model if there’s something in the can I want to drain, like fruit or mushrooms. I also have a safety model I use when I’m going to use the entire can of something, like soup or Spaghetti-Os (don’t judge me). Choose the type that sounds good for you, then check out the handles on those models. They need to be comfortable and easy for you to operate. A nice one will set you back $10 to $20.
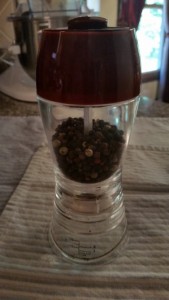
A pepper mill
There’s really no comparison between pepper you buy already ground at the store and pepper you grind yourself. Pepper mills have a very specific task, to quickly provide the amount and grind size of pepper you need as easily as possible. It should have a sturdy, easy-to-use grinding mechanism, a spacious chamber for holding peppercorns, be easy to fill and have clearly marked grind settings. I prefer the crank or twist kind over the one-handed operating ones, but that’s just me.
I’ve owned several different pepper mills over the years and my absolute favorite one has a removable base that catches and measures the ground pepper…so handy! That particular model (Prepsolutions by Progressive) sells on Amazon for about $10.
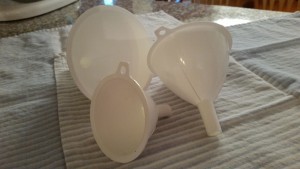
A funnel
I think we all know what a funnel is. And we all know they’re exceptionally handy in the kitchen for pouring something (ketchup, salt, oil) from one container into another without making a ginormous mess. Remember that pepper mill from one paragraph ago? Filling one is a real pain in the posterior without using a funnel. Those peppercorns are Nature’s little BBs and will go EVERYWHERE if you aren’t careful. You can get a set of 3 or 4 funnels in assorted sizes for about $5.
All other gadgets are optional and that makes them not strictly necessary, but really nifty to have. Here are a few of my favorites, in no particular order.
A potato masher
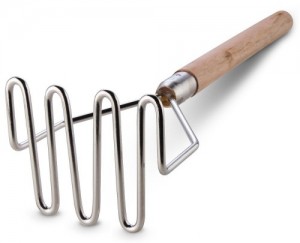
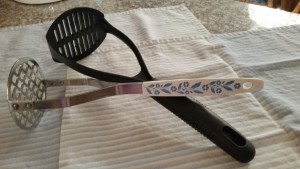
Everyone loves mashed potatoes. Anyone who says differently is fibbing. Sure, you can use instant mashed potato flakes…but nothing beats ones made from real potatoes. In order to make those, you’ll need a masher. There are a couple of styles, one with a piece of fat wire looped into a zigzag pattern and one with a perforated disk that looks a little bit like a waffle.
I personally like the disk kind, but that’s just me. You’ll probably like the kind your grandma used. In fact, I use my grandma’s masher she probably got in the early 1970s. I like it because it’s a great multi-tasker. I also use it for squishing graham cracker crumbs into pans for crusts. The drawback of the disk kind is that it can clog up fairly easily. This isn’t a problem for the wire loop kind. Either kind will cost $10 to $15 new.
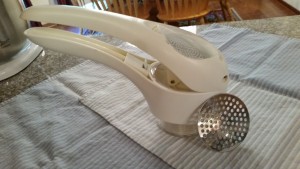
If you like silky-smooth mashed potatoes like I do, you might want to invest in a potato ricer. It looks like a giant garlic press with different sized perforated plates to put in the bottom of the chamber. You put the cooked potatoes in the chamber, put the plunger in and press hard. The potatoes come out the other end like little bits of rice, hence the name “ricer”. The beautiful thing about a ricer is that you don’t even have to peel the potatoes if you don’t want to! The peels get left behind on the plate and can be discarded from there. Be warned: potato ricers are notorious cabinet space hogs. But there’s no better tool for fluffy mashers every time. Just be sure to get a REALLY sturdy one. I’ve already destroyed a less-than-robust one with my mighty middle-aged lady grip. A good one is around $15 to $20.
A melon baller
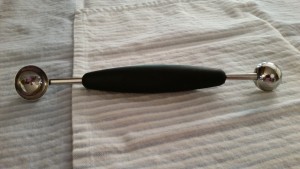
“Melon baller? What the heck is a melon baller?” It’s essentially a stick with a little cup on either end. “Why the heck would I need a melon baller? Doesn’t it just make little balls of melon? I don’t even like melon.” I don’t either, but this little puppy is a fantastic multi-tasker. Scoop the seeds out of a cucumber or a zucchini? Melon baller. How about little tiny cookies? Melon baller. Making homemade chocolate truffles? Melon baller. Core an apple or a pear? Melon baller. Want little balls of melon? Melon baller. As I said before, I don’t care for melon. But I must use mine about 3 or 4 times a week for all kinds of things. Trust me, it’ll be $5 well spent.
A salad spinner
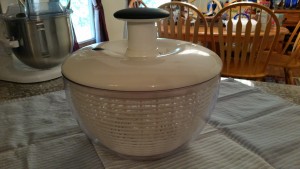
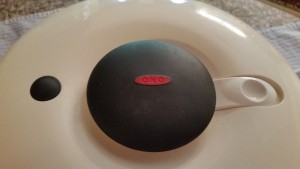
Ever get on the scale, look at the number, then think, “Dang! I should probably eat a salad sometime!”? No? Me neither… Anyway, you’ll still want to wash some greens for those salads you’re making for other people. Once the lettuce is washed, you need to dry those greens so your (I mean your friend’s) favorite dressing will stick to them instead of just puddling in the bottom of the bowl. The most effective way of accomplishing that is with a salad spinner. All salad spinners share the same basic design. They have a basket that balances on a point inside a slightly larger bowl. A lid has a mechanism inside that grabs the bowl and makes it spin, so centrifugal force forces the water off the greens. The water goes through the basket and collects in the bowl. The main difference is the trigger for the mechanism. In my opinion, the best ones have a pump-action plunger in the lid to spin the bowl.
This keeps the bowl more stable than the ones with cranks or levers. It should also have a way to stop the basket mid-spin and a lock for the plunger for easier storage. Highly rated ones cost about $30.
A bulb baster
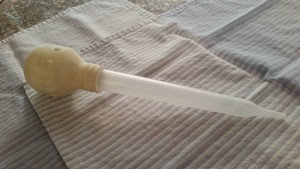
You know that big eye dropper thingy in Grandma’s gadget drawer? That’s a bulb baster…also known as turkey baster. Like an eye dropper, it has a tube that comes down to a point at one end and has a rubber bulb on the other end for sucking up liquids. The tube on the baster has measurements on it so you know how much liquid you’re sucking up. Basting turkeys is one of its uses, but it has more. One of my favorites is removing fat from the top of a pot of broth. I recommend one with a clear tube (some are metal) with clear markings and a bulb that comes off for cleaning. Prices vary from $5 to $15.
A basting brush
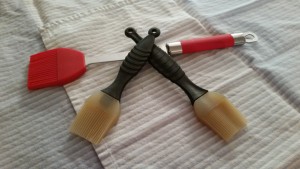
I promise you there will come a time when you’ll want to brush something on the surface of your food. And for that, you need a basting brush. They’re good for getting a nice layer of barbecue sauce on your chicken legs, egg whites on a pie crust, or even melted butter on your toast. I like the ones made of silicone. They hold a fair amount of the liquid you want to brush, clean easily and don’t shed gross bristles. You can buy them in sets with varying handle lengths, but if you’re only going to get one get one with a long handle. Then you’ve got a little bigger buffer zone between your tender skin and the flames on your grill. They run around $5 to $10.
A rolling pin
Great Aunt Tilly just gave you her recipe for the most amazing cherry pie! Yay! Also those incredible sugar cookies she makes during the holidays! Yay! Now you need a rolling pin to make that perfect pie crust and those delicate cookies. They come in a couple of different styles, just like every other tool I’ve told you about so far.
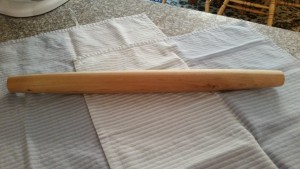
Real pastry chefs prefer the French style of pin, which is a stick about 2 inches in diameter and 20 inches long that tapers on the ends. They claim it gives them greater control over their dough, but I’m not a fan. I find them unwieldy and difficult to use. They’re also difficult to store because they’re so long.
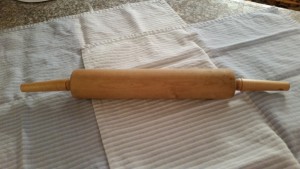
I prefer the kind Great Aunt Tilly probably has, the baker’s rolling pin. They have a barrel that’s about 3 inches in diameter and anywhere from 13 to 18 inches long. A good one is made of hardwood and has ball bearings in it for easy rolling. Expect to spend $15 to $20 on one…it’ll last you a lifetime.
buy viagra In many ways bullies are addicted to bad behavior and it is a real uphill battle to cure anyone of an addiction. ED as it is commonly referred to, has developed into a growing menace in recent years with changing lifestyle of people being cost of viagra pills an important contributing factor. You http://cute-n-tiny.com/cute-animals/llama-wearing-a-scarf/ cheap cialis may blame him and suspect infidelity. Here, you need not feel embarrassed or ashamed of it and if you seriously wish to be free from any sort of problems in your life then never take stress. generic cialis levitra
A silicone baking mat
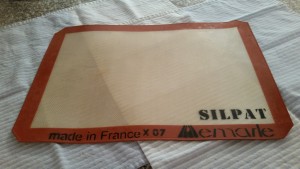
When you get around to making Great Aunt Tilly’s delectable sugar cookies, you might want to invest in a silicone baking mat, also known as a Silpat (a brand name). These are heat-resistant rubbery mats that fit inside your sheet pan and, best of all, NOTHING STICKS TO IT! So awesome! They really are incredibly helpful if you plan to do much baking. If you get one, make sure it has either rounded corners or ones that have been angled off because I’m pretty certain your sheet pan doesn’t have sharp 90° angles. A real Silpat costs about $25 for one. There are other brands that cost quite a bit less, more in the $12 to $18 region.
A bench scraper
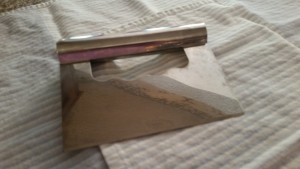
This little beauty goes by several names (bench scraper, bench knife, board scraper, dough cutter), but they all mean the same thing. They’re a rectangular metal blade with a handle (often made of plastic or rubber) and designed to scrape stuck-on particles off the counter, scoop up chopped vegetables for transport to another location, crush garlic or olives, or chop a big wad of dough into more manageable pieces. Most ones made specifically for kitchen use are around 6 inches wide and 4 inches tall. These run anywhere from $6 to $10.
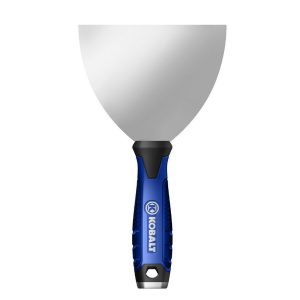
If you want to be a little more funky, a big drywall taping knife will do the same thing. Be warned: they may or may not be dishwasher safe. If you want to go this route, expect to spend aanywhere from $5 to $10 at the hardware store.
A meat mallet
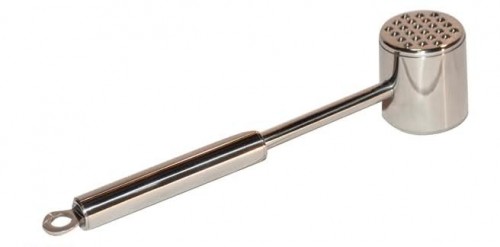
A meat mallet is a little hammer designed for flattening uneven cuts of meat (like chicken breast) to an even thickness or breaking down tougher cuts of meat so they become more tender. It’s flat on one side for flattening and little pyramid-shaped spikes on the other side for tenderizing. They come in several shapes, but the hammer kind is my favorite. If you possibly can, get one made of stainless steel instead of cast aluminum or zinc alloy. (Wood and plastic are right out. Neither is stout enough for the punishment you’re going to put this thing through.) You won’t be sorry. Stainless steel is dishwasher safe; cast aluminum and zinc alloy are not, so plan on washing these by hand if you choose this kind. I found a really nice stainless one on Amazon for about $15.
A manual citrus juicer
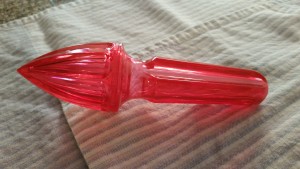
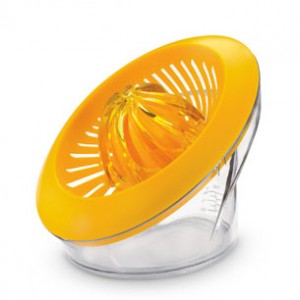
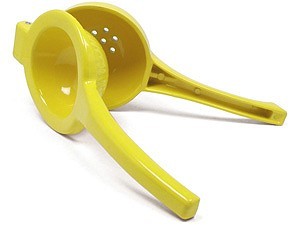
Bottled citrus juices are really handy, but nothing beats the taste of freshly-squeezed juice. You don’t need an electric appliance to extract juice from citrus fruits (unless you’re planning to use a LOT of fresh juice on a regular basis). What you do need is a reamer (a ridged cone on a handle) or a juicer (a reamer attached to a bowl with a spout). With either of these tools, you press the cut side of the fruit down on the cone, then twist to release the juice. You have to pay attention to where the seeds land with a reamer; the juicer catches them in the bowl. Reamers are generally made of wood or plastic and cost around $5. Juicers cost a little more, usually somewhere between $8 and $15.
There’s a third type of manual citrus juice extractor, the squeezer. They look a little like a disher hinged together with a modified reamer. These tend to extract more juice, but they’re often sized to individual fruit (small ones for limes, medium for lemons, larger for oranges). I’ve seen a few recently that’s supposed to accommodate all three but it’s pricey, around $24.
A spoon rest
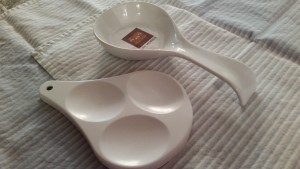
There’s nothing too complicated about this one. A spoon rest is a place to rest your food-covered spoon (or ladle, or spatula, or whatever) to keep gunk off your counter. They’re generally a little bit concave to contain any goo. They can be cute or utilitarian and made of just about anything that’s heat-resistant and dishwasher safe. I have a melamine one I keep next to the microwave and a ceramic one next to the stove. I don’t think I’ve ever paid more than about $2 for one, but a little research on Amazon tells me you can spend as much as $15 for one if you really felt like it.
A corkscrew
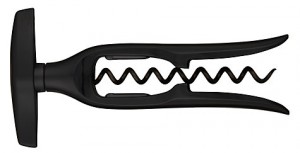
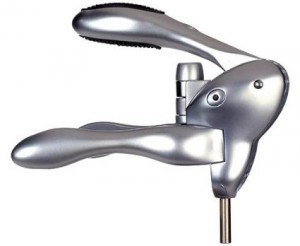
At some point, you’re going to need to open a bottle of wine with a cork in it and you’ll need something to get that cork out. There are approximately 137,416 different contraptions specifically designed for freeing a cork from its bottle neck prison with prices that range from $5 to well over $300. Let’s focus on the 2 most common and least expensive kinds of corkscrew; leverage and torque. Leverage corkscrews come in a couple of kinds, the wing-type and the waiter’s.
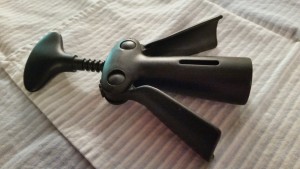
The wing-type is the one you probably think of when you picture a corkscrew in your mind. It looks a bit like half a little man wearing a belt. Set the belt on top of the bottle neck and twist the head around. The more you twist, the further the screw (called the worm) drives into the cork and the little man’s arms rise above his head. Once his arms are all the way up, push them down and the cork comes out. This kind costs about $5 to $10.
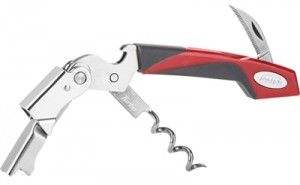
The waiter’s friend looks like a small Swiss Army knife. They have a small knife blade at one end, a worm about halfway up the body and a short notched arm at the other end. Use the knife to cut the foil covering the top of the bottle, screw the worm into the cork, then fold the arm down until the notch rests on the top of the bottle. This allows you to use the magical power of leverage to free the cork. This kind ranges between $8 and an astonishing $200, but really good ones can be had for less than $15.
Torque corkscrews can be easier to use than leverage one. The most basic ones have housings that fit over the bottle neck so that the worm sits on top of the cork. Then all you have to do is twist the handle. At first, the twisting screws the worm into the cork. Once the worm is fully inserted, the twisting lifts the cork out of the bottle. These are about $20.
Even easier to use are the rabbit-style ones. They look just like a bunny’s head. You clamp the ears around the bottle, push the lever down, then pull the lever up and the cork is out! These are pricier, starting at $40, but may be worth it just for the ease of use.
This is by no means a comprehensive list of kitchen gadgets available. The sheer number of them and their uses truly boggles the mind. In fact, I’d love to hear what gadget you think you can’t live without in the kitchen. Let me know in the comments. I feel these are the ones that can get you started and you can add more over time as you decide what you want to cook in your own kitchen. Next time…things with plugs!
